[Note: This post was horrendously delayed due to …insert your best excuse here….]
The last few months of 2017 were a bit nutty. We spent two weeks in Italy, attended Oktoberfest in Munich, and moved to Seattle for a new job (for me, not Dan). As the holidays approached, we prepared for (yet another) cross-country move. It was a stressful end to 2017. And when I get stressed, I eat. And I bake. And I cook. And I partake in an exceptional amount of wine.
And all of those things send a wave of warm and fuzzy memories of the culinary prowess of Italy…
Our tour of Italy was a whirlwind. We landed in Rome during a horrendous downpour that caused enough flooding to shutdown the city landmarks. But we traipsed around anyway, and with soggy shoes and inadequate umbrellas, we sought out delicious food and coffee to warm us up. Our trip took us around the “boot” with a sampling of Italy’s best. We walked the eerily modern roads of Pompeii, navigated the back alleys of Naples, saw the beauty of the Amalfi coast, hiked a volcano in Sicily, drank wine in Tuscany, and did a cicchetti “crawl” in Venice. But no matter where we were in Italy, the food was incredible. Never have I eaten so many carbs with so little regret.
Too often we complicate things. We make recipes with enormous lists of ingredients, spend hours standing over a stove, use every pot and pan in the kitchen…and we believe that it is necessary to create an impressive meal. Enter the Italians.
One of the most remarkable aspects of the food we ate in Italy was its simplicity. Caprese, burrata, cacio e pepe, carbonara…even the iconic Napoli pizza is just a few simple, albeit incredibly fresh and regulated, ingredients. It is no-fuss cooking, perfected.
A Tuscan steak grilled to your exact preference and approval. Fresh handmade pasta with a rustic ragu. And a fire-kissed pizza crust topped with only San Marzanos, fiordilatte, and basil. Simple. Delicious. Done.
Some of our best vacation memories are the ones that happen by accident. In this case we were driving the back roads of Tuscany, somewhere near Gaiole in Chianti, and saw a small orange sign that said “Rural” with an arrow. Intrigued and always up for adventure, we wandered our way to town.
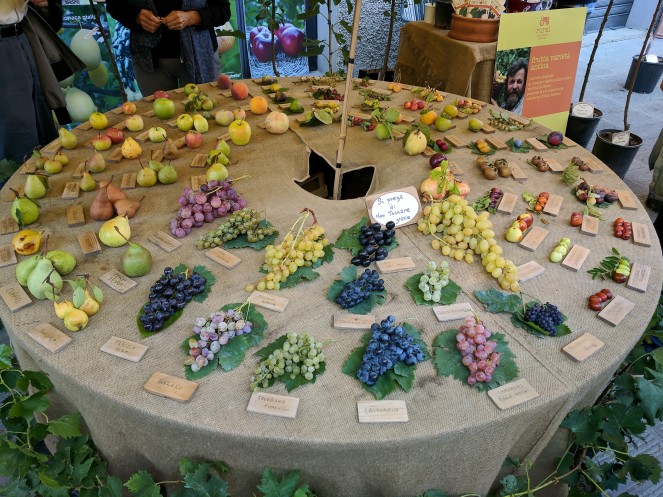
A few more twists and turns of country roads, and then…magic! We stumbled upon a fabulous local festival of all things artisan – cheese, wine, meats, vegetables, farm-to-table restaurants… All the samples to be had and the price of free. Free, you say? Fresh delicious things, you say?
I’m in.
What was more impressive that the extensive selections of provisions were the warm, welcoming, and characteristically loquacious locals serving them up to mere wanderers like ourselves. In Italy there is so much pride, in every. single. thing. It’s encapsulating and contagious.
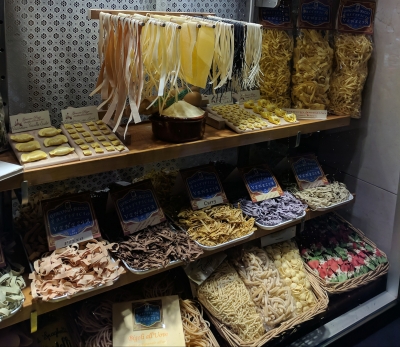
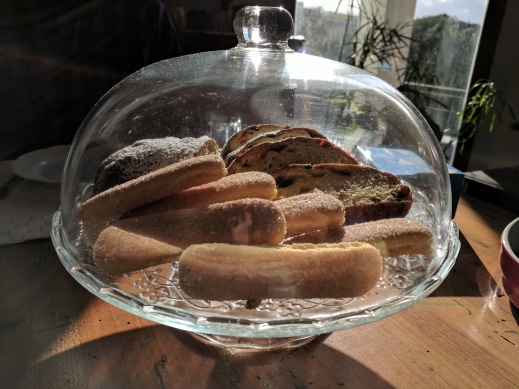
Handcrafted cheese wheels of your 90’s ‘Supermarket Sweep’ dreams. Slices of meat so tender it melts on your tongue. Glasses of lambrusco with the perfect blend of sweet, dry, and bubbly. Gelato that’s perfectly creamy, not too sweet, and always made fresh.
Sure, you can wander the fashion-forward streets of Milan or get passed by a Ferrari or two in Maranello, but Dan and I will choose the option to wander the rural backroads and snack from farmstands any day. When food looks like this, it doesn’t need to be complicated. And that’s exactly the lesson Tuscany taught us.
It’s mid-February already. The tulips are starting to peek out of the ground here in Seattle (say what?!) and, from what I hear, the beautiful people of New Orleans are celebrating Mardis Gras with parades, floats, costumes, and of course, delicious food!
I visited NOLA for the first time last year for a work conference. With a city so passionate about its food and culture, I’ll admit that I spent far more time eating than conference-ing, and I have no regrets about it.
On the morning of a particularly bland conference schedule, I looked up local cooking classes to spice up my day. In hope of getting a hands-on experience to learn the secrets of the cajun and creole cuisine, my search lead me to the New Orleans School of Cooking in the French Quarter. With my expectations set reasonably high, I walked into the adorable shop, rolled up my sleeves, and had the best six hours of my NOLA vacation (ahem, I mean work trip).
The 8-person class was divided into teams of two, and we worked together to create some of the most quintessential recipes of Louisiana: pralines (PRAH-leen-z), shrimp and grits, gumbo, and bananas foster. I learned so much and ate my weight in delectable dishes at the end.
Cooking with mimosas? That’s my kind of kitchen!
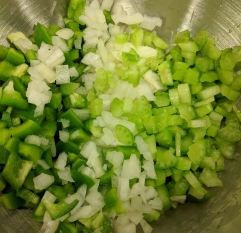
Roux meets Holy Trinity!
My favorite? Gumbo. I have a sincere love of anything stew-like, and southern-inspired versions are no exception. I love spice and depth and soupy-ness. Chunks of things and textures… Stews deliver it all. But what makes gumbo stand out from the rest is its humble roux beginnings.
Roux is simple. It’s just equal parts (by weight) of flour and fat. But like all great things (wine, brie cheese, Belgian tripels…) it takes time. Roux is cooked ever so slowly on the stove, allowing it to brown and develop incredible flavor.
While at my NOLA cooking class, I learned from a born-and-raised creole chef that roux should be stirred constantly, watched more closely than a toddler, and deemed ready when it has achieved the color of Worcestershire sauce. Like so…
Any discussion of NOLA cuisine also demands the mention of the “Holy Trinity,” a combination of diced green bell pepper, onion, and celery. Between a good roux and the Holy Trinity, you have the base of any good gumbo!
Cajun and creole cuisine (country and city, respectively) use a similar combination of spices. At the NOLA School of Cooking they use a pre-made combination called “Joe’s Stuff” which is a handy way to make anything taste great. You can easily make your own Cajun spice mix and keep it in an airtight jar for whenever you food needs a little kick. There are plenty of good spice mix recipes on the internet – here’s one to try.
Once you have your roux, trinity, and spice blend, gumbo is a breeze! Toss the veggies into the roux and allow to cook and soften. Then saute some garlic, add some spicy Andouille sausage and chicken, spices, and stock… Boom, done. Serve it up in a big bowl with crusty French bread and you’ll have a soul-warming stew that will have you feeling all the NOLA vibes!
I like to serve my gumbo over rice, and sometimes I add shrimp to jazz it up a bit (see what I did there?). Top it with some chopped green onions, if you like… Add some extra spice… Go nuts, it’s your party!
A traditional recipe for classic New Orleans gumbo
Credit: New Orleans School of Cooking
Ingredients
1/4 lb. lard or 1/2 cup oil
1/2 cup all-purpose flour
1 lb. chicken, cut into cubes
1 lb. Andouille sausage, cut into slices
2 cups onions, diced
1 cup celery, diced
1 cup green pepper, diced
1 Tbsp. garlic, chopped finely
6 cups chicken or vegetable stock
1 cup green onions
Joe’s stuff seasoning (or Cajun seasoning mix)
Salt and pepper, to taste
Directions
Season and brown the chicken in 1/4 cup of oil, lard, or bacon drippings over medium heat in a large pot. Add sausage to pot and sauté with chicken.
In a skillet, make a roux with equal parts flour and fat (oil or lard). Stir constantly and cook on medium-low heat until deep color (similar to penny or Worcestershire).
Add onions, celery, and green pepper and sauté for a few minutes. Then add garlic and stir until fragrant. Add to pot with chicken and sausage, stirring frequently.
Gradually stir in stock and bring to boil. Reduce heat to simmer, season with Cajun spices, salt, and pepper (to taste).
Serve gumbo over rice (or not) with crusty French bread on the side.
Well, hello there! Long time, no see! I’ve been on hiatus as a result of job transition, holidays, moving, and more. But I have plenty of things to write and update, as well as a few blog goals for 2018. So here goes…
About three months ago I signed my foreseeable future away to the University of Washington, and so began a cascade of stressors including packing up the house in New Mexico, moving across country over the holidays, and plopping ourselves in Seattle, WA. We are still living out of boxes, but are starting to get settled and feeling a bit more functional as we find our way around our new neighborhood.
Naturally the first sign of normalcy meant it was time for a new “Chopped Challenge” (as Dan calls them). As we perused our local produce market, Dan was inspired by the guavas on sale. At the checkout stand he turned to me, with that classic sly grin and a handful of guavas and said, “Chopped challenge?”
Aaaaaand we’re back in business!
My repertoire for “islandy” recipes is sadly limited. I’m a relative novice to tropical fruits and flavors of equator-based nations. I can throw together a mango salsa for fish or some pineapple fried rice, but that’s typically where my Rolodex is tapped out. I think this is an excuse for more island vacations…Eh?
Given my lack of knowledge of guava and its origins, I turned to the internet for inspiration. Most guava recipes lead me in a direction of sweets and desserts: guava cake, guava jelly, guava daiquiris (1984 called, they want their cocktails back), but very few options for an actual meal.
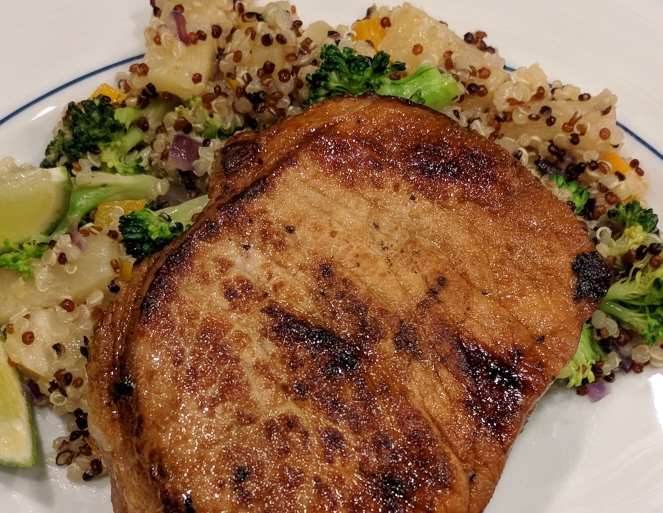
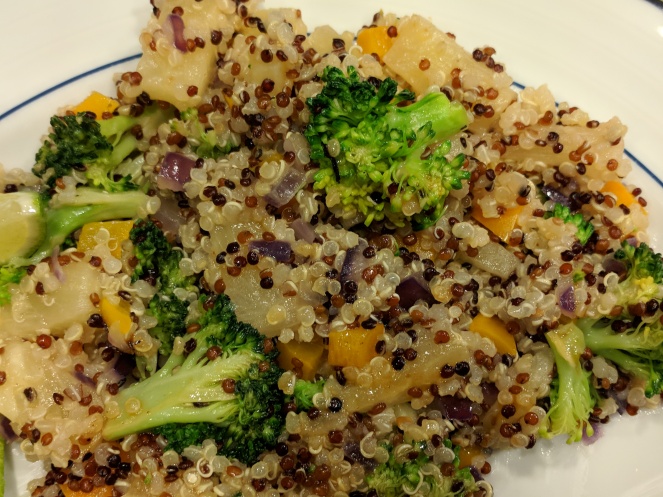
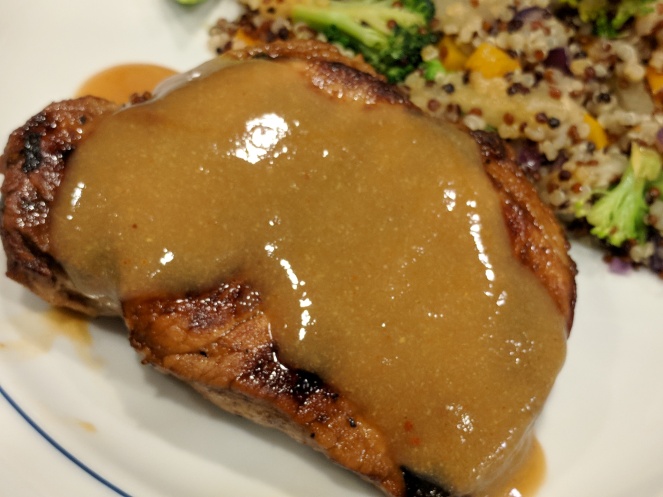
The few savory and main dish recipes I found focused on guava paste, which is typically used in Latin cuisine and can sometimes be found on cheese plates. There was very little to offer for savory cuisine using fresh guava fruit. So, true to my nature, I combined about 6 recipes with reckless abandon and hoped for the best. I was inspired by a recipe for BBQ guava chicken thighs and translated this to a guava-marinated pork chop, seared and then cooked through with a guava sauce on top. For a side dish, I tossed together a salad of quinoa, broccoli, bell pepper, and pineapple.
The verdict? It was fresh, fruity, and vaguely reminiscent of the islands, which was a welcome change from the rainy Seattle winter outside. In hindsight, I would have used “red” guavas rather than “white” (for aesthetic reasons – note the unattractive brown color of the sauce). I would have added a dash of white wine vinegar, or something akin to it, to cut the sweetness and add a tangy twist.
Would I make it again? Sure! But next time I’ll have a rum punch in hand!
Seared Pork Chops with Guava Sauce
*Recipe serves 2 hungry folks. In true “challenge” fashion, there’s a lot of winging it in this recipe (dashes of this, splashes of that). Taste as you go and let your taste buds guide you to victory!
Ingredients
2 boneless pork chops
3 ripe guavas (red or white), cut in quarters and seeds removed
8 oz. can of diced pineapple
1 t. low sodium soy sauce
Dash white wine vinegar
Dash cayenne pepper
Salt and pepper
Directions
Make the guava sauce: In a small sauce pan, cover quartered-and-seeded guava pieces with water – just enough to cover the them. Simmer over low-medium heat for about 20-25 minutes until soft. Reserving one Tablespoon of the liquid, strain the guava from the water and transfer to small blender (a Ninja cup works well). Combine with 1 t. soy sauce, dash of pineapple juice, splash of white wine vinegar, and a dash of cayenne pepper. Puree to smithereens 🙂
Marinate the pork chops in half of the guava sauce for 30 minutes. Reserve the other half of the sauce and set aside.
Heat a skillet to medium-high heat and sear the pork chops on both sides. Transfer pan to oven and bake for 20 additional minutes (or until 160+ temperature is reached).
When pork is done, remove from oven and plate. Warm the remaining guava sauce if it is has cooled and pour over the top of pork chops.
Serve with a mix of quinoa, cooked broccoli, bell pepper, and pineapple (or whatever else you have in the fridge!)
My very first blog post was about my love affair with bread. The combination of four simple ingredients to make a myriad of flavors and textures. It’s a pretty incredible process and one that I’ve continued to master over the years. I love bread, carbs, and gluten. And I don’t feel one bit of shame saying it.
And then there’s pizza. Same ingredients, but a whole different ballgame. I enjoy pizza for what it is – a vessel for creativity in the kitchen. Now I’ve never been an artsy person and my parents probably swallowed a lot of pride putting my elementary school drawings on the fridge (“Well, at least she’s good at math?”). But what limited artist-like traits I possess come out when making pizza.
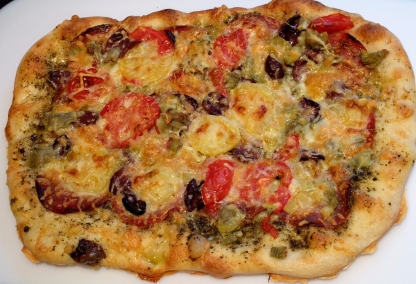
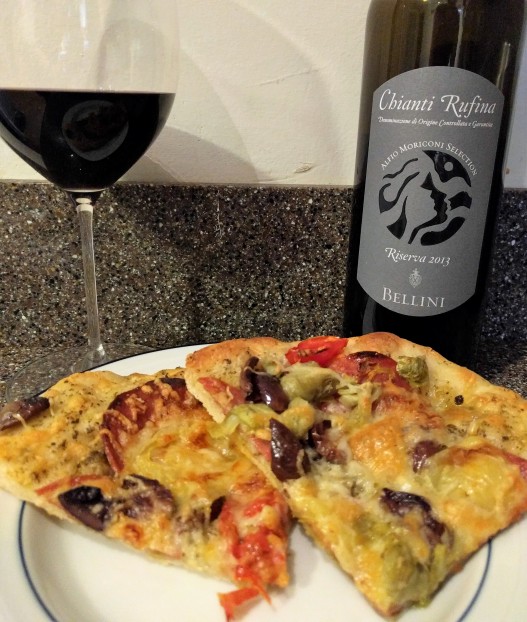
Pizza dough is a blank canvas. It’s an opportunity to build flavors, textures, and combinations to send your tastebuds on a journey. Personally, I appreciate when a slice has been gently kissed by wood oven flames, has a balanced ratio of crust:sauce:toppings, and provides a gentle crunch-n-chew in the crust. I prefer toppings that aren’t “fussy” and bring their own party to the pizza…like local New Mexico green chiles, fire-roasted, and diced to perfection. Or in the case of this pizza – salumi, locally-grown tomatoes, artichoke hearts, and kalamata olives.
Before…
After!
Recently one of Dan’s colleagues, a true Italian who was born and raised in Rome, flicked his nose in the air when Dan mentioned that I make pizza from scratch routinely. Reportedly (as I was not present for this conversation), he was unconvinced that I could replicate anything like the pizza of his childhood…and he’s probably right. But I make a damn good effort to get as close as I can to ‘authentic’ having never been to Italy myself, nor possessing a single chromosome derived from Italian heritage.
As a public service announcement, there is an organization called Associazione Verace Pizza Napoletana that protects the integrity of “true Neopolitan pizza” (akin to the German Reinheitsgebot for beer brewing standards). The AVPN is, more or less, the Italian Pizza Police. And, despite my best efforts, everything I’m about to say is probably condemning me to the Napoli gallows.
So let’s live dangerously, shall we?!
There is a world of debate on the internet about how best to go about replicating the magic of Naples pizza kitchens. Let’s be honest – it’s really hard. Our kitchens weren’t designed to pull this off, so we must improvise. So how do I attempt to make Napoli-style pizza at home, limited by my American kitchen and grocery? Two things: 00 flour and wicked high cooking temperature.
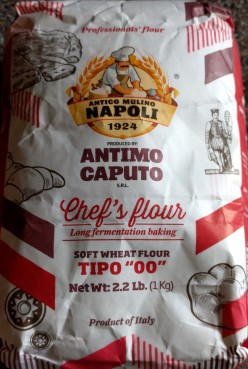
The first component is easily resolved. You need some of this stuff:
The “Godfather” of flour
Someday I will write an entire post about flour…all the nuances and mysteries (I could put babies to sleep with all the details), but today is simply a crash course in the context of pizza. 00 flour (“doppio zero”) is a very finely ground flour that is used almost exclusively for making pizza in Italy. This stuff is like powder. It’s probably used as a movie prop for lines of cocaine (don’t quote me on that). And that pulverizing mill process means that it requires less water to make a dough, so you’ll need to do some adjusting to get the right ratio in yours. Also, the protein content in 00 flour is slightly higher than your all-purpose flour that is an American kitchen staple (~12.5% vs ~11.7%), which means more intense gluten development and a fun “window pane” test to help you identify when it’s ready. Developed gluten = better chew, and that’s a beautiful thing.
The rest of the process is a matter of patience and practice. A recipe can say “knead 3 to 4 minutes” but that’s just a ballpark. It could be 2 minutes, it could be 10. Pizza dough, like any bread dough, is a feeling. Hence, the artform.
There is not magic number of kneads, amount of time, or visual identifiers that can peg a dough for readiness. First-timers will probably be annoyed to hear that learning the feel of a finished dough takes time, but once you learn it, you’ll perpetuate the same frustrating advice. See that white scraper thing above? It’s a great tool to start the kneading process when the dough is wet and prevent overworking – it’s simple, plastic, flexible, and costs a few bucks from KAF.
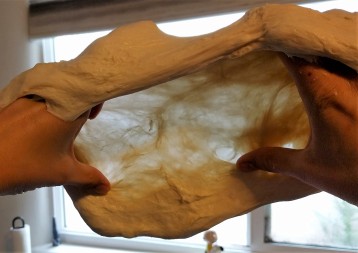
Window pane test against a window? Meta.
There is plenty of hope for newbies though, as the window pane test is as good as any tool when you’re starting out. After kneading by hand for several minutes, stretch the dough gently and hold it up. If it can hold without tearing and you can almost see through it (yep, like a window pane), the gluten is developed enough but not over done. In practical terms: It’s ready.
The second “secret” to awesome pizza is cooking at a temperature higher than any conventional home oven can achieve. In Italy that means wood-fire ovens that reach temperatures of over 1000 degrees. So what do you do when the home designer that built your 1951 ranch home didn’t consider your 2017 need for a wood-fire oven with proper ventilation? Use a pizza stone (or the latest trendy kitchen device: baking steel) and crank your oven to 500 degrees. This may void your oven’s warranty (don’t say I didn’t warn you). Oh, and keep your fire extinguisher handy.
Similar to baking bread, the initial “spring” and sear of the hot stone is key. Slowly cooking a pizza leads to soft, soggy, and underdone dough. So pre-heat that oven and slide the pizza dough onto the stone or steel. A peel is ideal, but I don’t have one. So I have perfected the back-of-a-sheet-pan slide technique that works like a charm, though took much practice. Do not use parchment paper at this temperature – it has a flash point of ~450 degrees (see fire extinguisher comment above).
Another challenge with the pizza stone approach is that the bottom of the crust browns and crisps before the top gets any color. If you’re feeling adventurous, you can switch the oven to Broil for the last 1-2 minutes of bake time to balance it out. Just remember that any time you use the broiler, watch it like a hawk. Things go from beautiful to burned within seconds.
The rest of pizza-making is creativity. Playing with combinations of sauces, cheeses, and toppings. I’m not here to judge what you put on your pizza…but I will anyway. Here are my thoughts on toppings:
Make your own sauce. That jarred stuff is an abomination and a can of crushed tomatoes and some spices is cheaper anyway.
In true Italian tradition, pizza does not have a ton of sauce. However, I’m Eastern European and we don’t abide by Neopolitan rules.
Similarly, cheese is a topping, not a blanket. But you do you.
Don’t use super-fresh mozzarella (the stuff swimming in liquid) or your pizza will become soup. Buffalo mozz is a pizza necessity – just pat it dry beforehand.
Dry out fresh tomatoes a bit before using them (slice and sprinkle a bit of salt to extract the water from them). This will help prevent a tomato juice lake.
If you’re using fresh basil leaves, tuck them underneath cheese or other toppings to avoid burning. Pepperoni slices make excellent hiding places.
Arugula or other fresh green should be added after the pizza has come out of the oven. Have you ever eaten baked salad? Exactly.
Use sun dried tomatoes that have been rehydrated in some fashion (either coming from a jar with liquid or DIY in a small bowl of water).
Mushrooms don’t belong on or in anything. Ever. This is not up for debate.
It’s almost like we’re in Ital… Nah, it’s still New Mexico outside.
Oh, and for what it’s worth, Dan’s Roman friend thinks my pizza is awesome. Count it!
Carolyn’s Napol-ish Pizza
Ingredients
1 1/4 cups of 00 flour (Antimo Caputo brand can be found online), plus extra for kneading board
1 cup of lukewarm water
3/4 teaspoon active-dry yeast (not rapid rise!)
1 teaspoon extra-virgin olive oil
Pinch of salt
Sauce and Topping as desired
Directions
In a large bowl, combine flour and salt. In a small bowl, combine water yeast and olive oil. Pour into dry ingredients and knead with hands or small scraper for about 2-3 minutes. You may need to adjust water or flour. Dough should be soft and flimsy, but not sticky. Let rest for 20 minutes, uncovered.
Knead down on a lightly floured board for 3-5 minutes. Place in a bowl and cover. Let rise for 3-4 hours. You can also put the bowl in the fridge to rise overnight (*if so, let it come to room temperature before the next step)
Divide dough into two rounds. Using the back of your hands, gently stretch the dough from the center to the outside, rotating the circle as you go.
Top as desired and bake in a 500 degree preheated oven (with baking stone) for about 10-12 minutes. If desired, switch oven to ‘Broil’ for last 2 minutes to even the color on top. Slice and serve with a glass of Italian vino.
Carolyn’s Favorite Red Sauce (Not claiming to be at all authentic, but it is delicious)
Ingredients
1 red bell pepper
6 cloves garlic (peeled)
2-3 Roma tomatoes
1/2 cup chopped onion
1 teaspoon dried basil
1/2 teaspoon dried oregano
1/2 cup red wine (and another glass for the chef!)
1/4 cup tomato paste
14.5 oz can, no-salt-added diced tomatoes
2 Tablespoons red wine vinegar
3 Tablespoons fresh parsley, chopped
Pinch cayenne
Dash of soy sauce
Salt and pepper, to taste
Red chile flakes, to taste
Directions
Preheat oven broiler. Cut bell pepper (flatten with hand) and Roma tomatoes in half and place skin-side up on aluminum-foil lined sheet pan. Place garlic cloves on pan too. Broil for 10-15 minutes or until pepper and tomatoes are blackened. Carefully remove and place tomatoes and bell peppers in a bowl and seal with plastic wrap. Set aside for 15-20 minutes to allow skins to peel back. Peel pepper and tomatoes, and chop roughly.
Meanwhile, heat a large skillet on medium heat. Add a bit of olive oil and saute onion and garlic. Add basil and oregano. Add pepper, tomatoes (roasted and canned), and garlic cloves, wine, tomato paste, vinegar, soy sauce, and salt/pepper to taste. Simmer 30 minutes, stirring occasionally.
Blend tomato mixture in food processor or blender until smooth. Stir in fresh parsley and red chile flakes, cayenne, and salt/pepper to taste. Use on pizza or pasta!
It’s summertime and that means BBQ with friends, Sauv Blanc on the patio, and lots of cold treats.
It’s no secret that I have a huge sweet tooth and despite chronic issues with cold sensitivity, I can put away ice cream like a champ. So, what’s even better than ice cream? Gelato! And what flavor tops the charts? Chocolate Hazelnut.
Arm me with a spoon and some sunscreen…I’m ready for summer!
What’s the difference between Gelato and Ice Cream? The short story is gelato has less fat and less air than ice cream. Generally, they have the same ingredients – cream, milk, sugar, and eggs (usually just the yolks that get cooked into the custard). The proportions are often different to create unique textures. Gelato typically has a higher ratio of milk to cream whereas ice cream is the opposite (hence, the higher fat content in ice cream). Gelato is also churned at a slower rate which means less air gets incorporated. As a result, it’s a denser, creamier experience.
There is a fantastic gelato place in Phoenix called the Gelato Spot. I love seeing all the colors and flavors filling the stainless steel bins. It’s an absolutely gorgeous display! For years I frequented the shop and splurged on cute containers filled with creamy goodness eaten with the world’s tiniest plastic shovel spoons (you know what I’m talking about). And, of course, that sparked the need to make it myself. For science? For convenience? Pshh, for pure gluttony.
Years ago I received an ice cream maker attachment for my KitchenAid mixer. Hands down it’s my favorite attachment and probably my most used and abused. Fun fact: I’ve made so many batches of ice cream and gelato that it started leaking blue goo (5 years later or so). I’m now on my second ice cream bowl and it’s already taken delicious custard to gelato heaven many times over. Making gelato is remarkably simple, but like most great things, it takes time.
There is an excellent ice cream and gelato recipe book called The Perfect Scoop by David Lebovitz that I recommend to anyone with an ice cream maker. Like all the best cookbooks, it has both incredible recipes and gorgeous photos. Even if you don’t make a single recipe, you’ll appreciate the art. But my favorite recipe in the book? Gianduja. It’s a classic Italian flavor of chocolate hazelnut that is the perfect balance of sweet, creamy, nutty, and chocolatey to hit all the tastebuds.
I’ll be honest. The recipe for Gianduja is a royal pain. There are a lot of steps. It requires stages that are, ideally, done in two consecutive days. But by day 3, you’ll be praising the heavens when you’re scraping the bottom of your fourth bowl of this stuff. It’s that good.
Recently Dan had a colleague who was in town for work. He came over for dinner with us and I had whipped up a batch of Gianduja for dessert. Unbeknownst to me, Dan’s colleague had just returned from two weeks in Italy, devouring gelato at least once if not twice per day. His bar for gelato was high and I was panicking. But after the first bowl he looked at me and said, “There’s more right?” and praised the flavor and texture over his second helping. See? It’s that good. Follow the steps, no substitutes or shortcuts, and you’ll win over hearts at the table.
Day 1
First, you need to gather as many bowls as you can find. There is a lot of moving mixtures from one bowl to another in this recipe. Don’t panic, just keep up with the dishes and you’ll be fine!
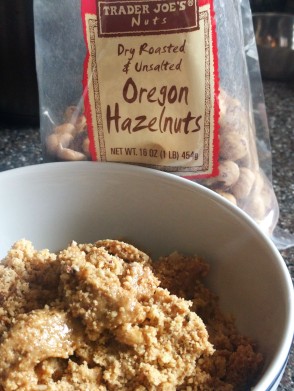
Step 1: Prepare the hazelnuts. Depending on the hazelnuts you purchase, you may have to remove the skins before chopping. The last time I was at TJ’s I came across this magical bag of peeled, roasted, and unsalted hazelnuts. All the work done for me!
You’ll chop them to smithereens (such a great word), preferably in a food processor or chopper. I find that my Ninja works wonders for this job. You’ll end up with a bowl full of finely ground hazelnuts, almost to the point of hazelnut butter, which, by the way, is going to be the new almond butter. You heard it here first, folks.
Meanwhile, on the stove warm the milk, cream, sugar, and salt. Do not boil. Once warm, remove the saucepan from the stove, stir in the hazelnuts, cover, and let steep at room temp for an hour. Think “hazelnut hot tub.”
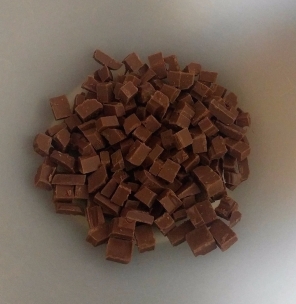
While all that steeping is happening, you’ll get to work on the chocolate. Chop it up into pieces and place into a bowl. Heat the rest of the cream in a saucepan until it just boils. Pour it over the chocolate and stir until smooth. Then set a strainer on top of the bowl and set it aside.
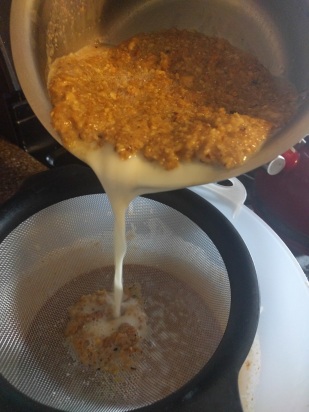
Once it’s been an hour, you’ll need to strain the hazelnuts and start making the custard.
Using a strainer and a large bowl, pour the hazelnut mixture and then squeeze the mixture with your hands to get out as much of the milk as you can.
The recipe from the book will say to discard the hazelnut mixture. Don’t. That’s blasphemy. If you’re like me, you couldn’t possibly toss $7 worth of sweet, toasted hazelnuts in the trash. Put the mixture in a bowl and leave it on the side – we’ll come back for it later, I promise.
Pour the liquid into another saucepan and rewarm it on the stove. In a separate bowl (see what I mean about the dishes?) separate the egg yolks and whisk until smooth. Then pour the warm, but not hot, hazelnut milk mixture into the eggs, whisking the whole time.
It’s important NOT to do this the other way because the eggs will cook and you’ll have gross hazelnut scrambled eggs and no gelato. And that would be sad.
Then scrape the mixture back into the saucepan and stir constantly with a heatproof spatula until the liquid thickens and coats the back of the spoon.
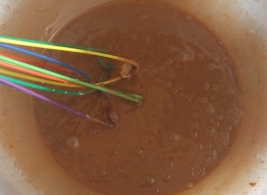
Remember that bowl with the chocolate? Assuming that you didn’t get hungry and ate it all, pour the warm mixture through the strainer on top of the chocolate. Add vanilla and stir with a spool over an ice bath to cool gradually.
Once cool, cover the mixture and place in the fridge for 18-24 hours. And if that ice cream bowl isn’t in the freezer yet, put that in there too.
Day 2
Now that you’re well-rested from the first day, you’ll be excited to know that Day 2 is a breeze by comparison.
Set up your ice cream maker. Get it turning, pour in the custard, and walk away. Typically my machine takes about 10-15 minutes until it’s ready, but follow the instructions on yours to be sure.
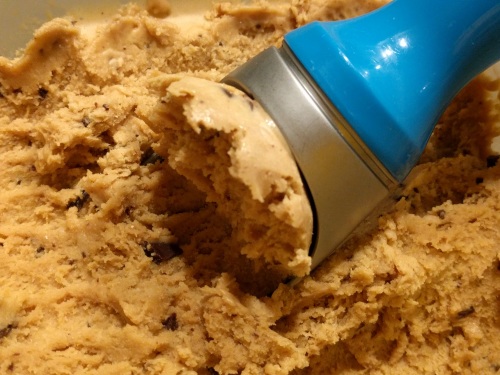
Just before it’s finished, toss in the chocolate shavings until they are mixed through. Pour the gelato into a freezer-safe tub (glass snapware works wonderfully) and put it in the freezer overnight.
Day 3
Eat the gelato. All that hard work? Two whole days?! After that first bite you won’t even care. Enjoy the fruits of your labor…and for goodness sake, have a second bowl! You earned it!
Bonus: Remember that hazelnut mixture that was put to the side? Mix in about two teaspoons of flour, spread it out in a thin layer on a silicone baking mat, and bake for about 20 minutes at 400 degrees. Let cool and crumble over the top of the gelato.
Gianduja Gelato (from David Lebovitz’s The Perfect Scoop)
Ingredients:
1 1/2 cup hazelnuts, chopped finely
1 cup whole milk
2 cups heavy cream
3/4 cup white sugar
1/4 teaspoon salt
4 oz milk chocolate, finely chopped
5 large egg yolks
1/8 teaspoon vanilla extract
2 oz dark chocolate, chopped very fine or grated
Directions:
Rub the hazelnuts in a kitchen towel to remove as much of the papery skins as possible, then finely chop them in a food processor or blender.
Warm the milk with 1 cup (250 mI) of the cream, sugar, and salt in a saucepan.
Once warm, remove from the heat and add the chopped hazelnuts. Cover and let steep at room temperature for 1 hour.
Put the milk chocolate pieces in a large bowl. Heat the remaining 1 cup (250 ml) cream in a medium saucepan until it just begins to boil. Pour it over the milk chocolate pieces and stir until the chocolate is completely melted and smooth. Set a mesh strainer over the top.
Pour the hazelnut-infused milk through a strainer into a medium saucepan, squeezing the nuts firmly with your hands to extract as much of the flavorful liquid as possible. Discard the hazelnuts* (I like to save them for a crumble topping)
Rewarm the hazelnut-infused mixture. In a separate medium bowl, whisk together the egg yolks. Slowly pour the warm hazelnut mixture into the egg yolks, whisking constantly, then scrape the warmed egg yolks back into the saucepan.
Stir the mixture constantly over medium heat with a heatproof spatula, scraping the bottom as you stir, until the mixture thickens and coats the spatula. Pour the custard through the strainer and stir it into the milk chocolate mixture. Add the vanilla and stir until cool over an ice bath.
Chill the mixture thoroughly in the refrigerator, then freeze it in your ice cream maker according to the manufacturer’s instructions. Add chocolate shavings during last minute in ice cream machine. Allow to freeze overnight and serve the next day.
Birthdays. The one day per year that you can channel your inner-child and be blissfully ignorant of your own poor choices from sun up to sun down. An opportunity to go hog wild in gluttony and others can’t judge you (at least not in good conscience). And no such birthday is complete without a cake.
Like most, I have probably eaten my weight in birthday cakes, which is a fun and slightly concerning visual. Growing up all my friends and family had their typical cake – the one they dreamed about for 364 days and then got to devour on the first day of their next trip around the sun.
My best friend always wanted ice cream cake and more specifically, Carvel chocolate ice cream cake with the “crunchies” in the center. My brother still has, and probably forever will have, an obsession with the Funfetti boxed cake that can only be topped with Funfetti frosting — no substitutions. My dad is a chocolate layer cake with chocolate frosting kind of guy, preferably eaten cold with a glass of milk. And I’m the weirdo who always asked for peach cobbler with vanilla ice cream, because I had to be different and I really, really, really like peaches. Cake is personality.
Honey Pistachio Cake
German Chocolate Cake
Strawberry Shortcake Cake
With cake comes memories. There is the spectacle of candle flames, the obligatory awkward singing, the botched slicing of the first piece, the argument over who gets the ‘corner’, and the one germaphobe who is praying to the cake gods that there isn’t too much spit from blowing out the candles. Cake is a vehicle for emotions.
When Dan and I were planning our wedding, we had plenty of input from others about what type of cake to have (or not have). Wedding planning brings out everyone’s unsolicited advice and the cake debate was a magnet for commentary. Ignoring all recommendations we went with what we wanted: strawberry shortcake. Summer wedding, 4th of July weekend, light and fresh. Boom. Done. Check that off the list.
But like I said before, with cake comes memories. When I attempted to cut our cake at the reception, the layers started falling and we only had seconds to react before it came down onto the floor. In swooped Dan and my brother for what ended up as one of my favorite photos from our wedding reception. Cake brings people together.
Stephen using the Force?
But, as usual, I digress…
Last month was Dan’s birthday (29 again!). Before I met him he reportedly did not have “his” birthday cake – the aforementioned annual event with pomp and circumstance surrounding the unveiling of the the dessert so longed for since the last birthday. No birthday cake? You can imagine the look on my face when he broke the news. Unacceptable. Not in my house.
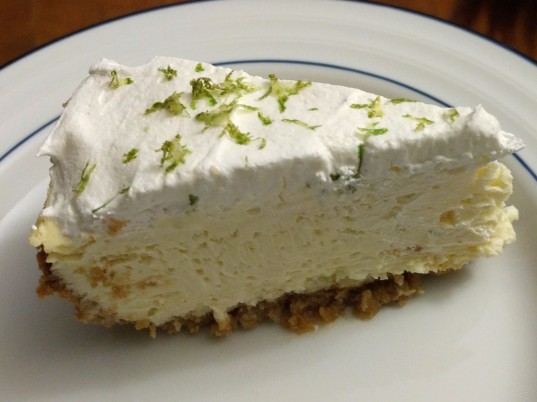
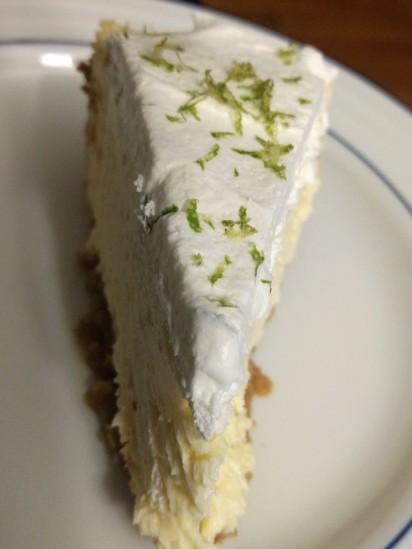
I don’t recall how or why Key Lime Cheesecake came to be “Dan’s cake.” I may have been looking for inspiration on the internet and stumbled across a recipe. Dan might have thrown me a challenge involving citrus. There may have been haphazard mention of “we haven’t had cheesecake in a long time.” Who knows?!
But the result was glorious. And I’ve had almost a decade of Dan birthdays (several 29th birthdays, in fact) to nail this recipe. It is reserved for only one day of the year and can’t make any cameo appearances. You have to earn this one.
Sour yet sweet. Dense but fluffy. Light but creamy. It’s a conversation starter and a conversation stopper at the same time. The head tilt as you experience a slight pucker in the cheeks? Priceless. It’s become legendary among friends and family. And it’s the most requested recipe that I possess.
This recipe is not the dense and intense slices of Manhattan. It’s more carefree and flexible. A laissez faire of cheesecakes, if you will. The bite from the key limes can be as sharp or mild as you like. Dan and I prefer that it packs a punch. You can ‘cheat’ with key lime juice in the bottle or commit yourself to several hours of extracting droplets of juice from several bags of key limes (your call, no judgment). A water bath is a good idea but not necessary. If the cake cracks in the center, no problem, because you cover it in whipped cream anyway. Cake doesn’t need to be stressful. Especially on your birthday.
Key Lime Cheesecake (Dan’s Cake)
Crust:
2 – 2 1/2 C. finely ground graham cracker crumbs
3 T. white sugar
1/2 C. unsalted butter, melted (may need more if too dry)
Cheesecake:
24 oz. cream cheese (3 8-oz packages), softened
3/4 C. white sugar
1/2 C. sour cream
3 T. all-purpose flour
4 eggs
2/3 – 3/4 cup key lime juice (to taste, if more juice add an extra T. of flour)
1 t. vanilla extract
Whipping cream (prepared the old-fashioned way)
Lime zest and lime slices (for garnish)
Graham Cracker Crust
In a bowl stir together the graham cracker crumbs and 2 tablespoons sugar, stir in the butter well. A food processor can also work if you’re starting from whole graham crackers.
Pat the mixture into the bottom and 1/2 inch up the side of a buttered 9 inch springform pan. When pressed firmly it should hold together up the sides.
Bake the crust in a preheated 375 degree oven for about 10 minutes. Transfer the pan to a rack and cool.
Key Lime Filling
In a large bowl with an electric mixer, beat cream cheese and 3/4 cup sugar until smooth, beat in the eggs, one at a time, beating well after each addition.
Beat in the sour cream, flour, lime juice and vanilla and mix until it is smooth. Add lime juice to taste for desired flavor and tartness.
Pour the filling into the crust. It will go above the height of the crust.
Water bath option: To reduce cracking, fill a 13 x 9 pan about 1/3 – 1/2 way up with water and place on lower rack of preheated oven.
Bake the cheesecake on center rack at 375 degrees for 15 minutes, reduce the temperature to 250 degrees and bake for 50 to 55 minutes longer, or until center is barely set. If you gently shake the pan, it will jiggle slightly in the center.
Let the cheesecake cool on a rack. After 10 minutes of cooling, use a paring knife to gently separate the edge of the cheesecake from the pan. Chill, covered, in the fridge overnight.
To serve, cover top of cheesecake with a layer of freshly whipped cream and top with freshly grated lime zest. If making ahead, you can store it covered in fridge or freezer without whipped cream and garnish (top just before serving).
I LOVE to travel. Seriously. If I won the lottery, or otherwise became independently wealthy overnight, I would throw some clothes in a bag and jump on a plane…possibly never to return. I have a major wanderlust problem.
Many of my passions I owe to my parents. In this case my love of travel was likely sparked by my favorite childhood book called “Busy, Busy World” by Richard Scarry. Countless hour were spent listening to my dad read the stories of different countries. From Hans the Dutch plumber, to Couscous the Algerian detective, it may not be the most culturally-competent piece of literature, but it ignited a need to see the world.
The book that (possibly) started it all!
As a kid I watched my parents plan family vacations before there was Kayak or Travelocity – in the days that you called an airline to book a ticket and the best hope for finding a decent hotel was the AAA book (“How many diamonds did it get?”). My parents divvied up the duties of planning trips. My mom went to the library for travel books, stopped by AAA for maps (yes, those things made of paper), and made dozens of phone calls to hotels to find the best-value accommodations for the four of us. Meanwhile my dad generated the all-important and comprehensive Excel travel spreadsheet – he created columns for flights, hotels, car rentals, and planned activities. Before we left, he printed the spreadsheet and added it to the manila folder that my mom labeled simply “[Destination] [Year].” As far as I know, they still follow this remarkable routine. Call it nature, nurture, or both…my approach to travel planning is a 50/50 fusion of Mom and Dad.
I spend an exorbitant and embarrassing amount of time planning my travels. I love it. I revel in it. As soon as there is a tentative date in the books, I’m on the couch with Tripadvisor and a glass of Merlot. Pure bliss.
I love traveling for a lot of reasons. Adventure. Culture. People. Customs and traditions. Driving on the wrong side of the road. Coffee that doesn’t taste like sewage. Weird animals. Bizarre plants. Outdoor activities that OSHA would shut down in a heartbeat. Oh, and FOOD. Lots of food!
After booking flights and hotels, my travel research goes immediately to local cuisine…the typical meals, the agriculture, the local and key ingredients, and all the bastardization that Americans have done to the country’s core dishes (Mexican food is probably the best example, although Chinese could easily be argued as #1).
I haven’t made the big 3-0 yet, but I’ve done some damage to the ol’ globe. Dan and I have a standard for counting a place as “traveled” – it only counts if you have spent the night and eaten a meal outside of the airport or hotel. Otherwise, you’ll have to go back and try harder. By last count I’ve traveled to 21 countries…and I have (at least) two more in the books for 2017. What does that mean? A lot of great food!
There are many meals that I remember fondly. Bites that I can still pull up in full technicolor smell-o-vision that create an involuntary ear-to-ear grin on my face. For me, food has always been the at the center of my memories. Travel eats and sips are no different.
Whether this post is for travel inspiration or just my fond reminiscence and gluttony, we’ll never know.
Without further adieu, I give you “Carolyn’s Top 10 Meals Abroad, So Far…” (in no particular order)
Patacones con frijoles (Casco Viejo, Panama)
Pipa’s on the beach
Patacones con frijoles
Casco Viejo is the “old town” of Panama City, located just outside the main urban metropolis. The food of Panama is simple, fresh, and delicious. Patacones are found all over the country and the ones we found in Casco Viejo topped the charts. It was one of our first stops after arriving in Panama and we were looking for a satiating snack. We found it in the patacones. Imagine an enormous plantain, flattened and fried, topped with beans, fresh salsa, and cheese. It’s like nachos on steroids, but way tastier! You can eat it with a fork and knife or just tear it up with your hands. Starchy, messy, and filling. Wash it down with a Panama beer and you’re ready to take on the day!
Trdelnik (Prague, Czech Republic)
Among my backpacking travels in Europe, I spent several days exploring Prague. It was December and brutally cold. The only saving grace? Christmas markets, sparkling lights, and trdelnik – a delightfully twisted spiral of a pastry roasted on a spit and kissed by open flame. Trdelnik is as much of a spectacle as it is a food. The small market huts have several spindles turning in unison over coals. Looking something like giant sugar kebabs, you can sip your mulled wine and watch them turn until perfectly golden brown. They are then expertly sliced and slipped off onto a plate for your enjoyment. Still holding their cylindrical shape, it may be the most unique approach to pastry. Crisp, flaky, and sweet. Now if only I could pronounce it…
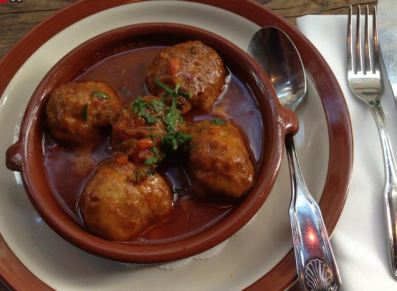
Albóndigas (Barcelona, Spain)
Spanish cuisine is known for small plates, better known as tapas. Cold and hot small dishes and plated up and brought to the table to share with your fellow diners. While wandering the streets of Barcelona, I stopped into a small, unassuming cafe with a simple menu that lacked any English translation. Being that my Spanish is poor and the people of Barcelona speak Catalan, I picked the only thing I recognized – meatballs. Albóndigas are a tapas menu staple and this little cafe whipped up the best batch I’ve ever tried. In a small pot, these juicy, slightly crispy meatballs are served in a spicy, chunky tomato sauce. They are the perfect compliment to the lighter tapas. They are great for a snack, even better for a meal, and the best as both. Mmhmmm, that’s how you do tapas!
Røkt laks (Oslo, Norway)
I traveled to Norway during the month of November. It was snowing and the wind cut straight down to your bones. While wandering Oslo on foot I worked up an appetite and found myself in a handful of cafes, probably more for the indoor heating than the food, but I was pleasantly surprised by the latter! Prior to setting foot in Oslo my limited understanding of Nordic/Scandinavian cuisine consisted of lutefisk and the IKEA cafeteria. As a backpacking college student, my budget was tight and Scandinavia is expensive, so I’ll admit that most of my calories came from “boller” (chocolate buns for a few kroner each). But for one meal per day I went big – and that usually meant fish. To my delight (and sadness) the number of delicious fish dishes far outnumbered my days in country. My favorite of them all was røkt laks, which is just outstanding smoked salmon. It is served many ways, as part of a bigger dish or solo. I preferred it as part of breakfast with eggs and a slice of ridiculously dense bread. This is the type of meal that gives your body plenty of energy and gives your stomach a challenge for the next six hours. On the cheap and freezing in Oslo? Get yourself some røkt laks!
Baguette (Paris, France)
Backpack and a baguette!
When I was little my dad would tell me stories of his world travels. One of my favorites was from Paris. He spoke of wandering into a French bakery overwhelmed by the sights and smells, buying a classic baguette that was perfectly golden, and then walking the River Seine, tearing off small pieces and enjoying the city and the bread. He described it as a ‘perfect day in Paris.’ I tucked story this away for years until I wound up in Paris in the fall of 2007. Bound and determined I found the best bakery I could smell, bought a classic baguette, and took a stroll down the Seine, taking in the surreal surroundings of the Notre Dame, Sainte-Chapelle, the Louvre, and the Eiffel Tower. Bread has never tasted so crusty, fluffy, and chewy. The smell is one that will stay with me forever. And, for the record, it was even better than my dad said it would be.
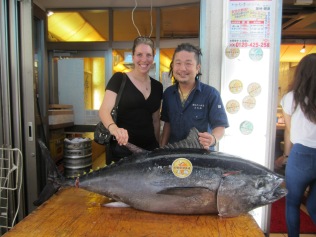
The World’s Freshest Tuna (Tsukiji Fish Market, Tokyo, Japan)
Japan is incredible. Of all of my travels, this island nation takes the cake for the most adventurous culinary experience…and I loved every minute of it. The world-famous Tsukiji Fish Market was one of my last stops in Japan. I made a point to be there at dawn for the tuna auction where the fisherman drag in their morning catches and lay them out for seafood shops and restaurants to battle over. In a whirlwind of yells and smells, enormous tuna are whisked off to their final destinations. Naturally, I followed. Outside the auction are dozens of stalls that were slicing, dicing, and prepping their winnings. I spent the better part of an hour watching the spectacle that is the traditional preparation of the tuna with upwards of 10 different knives, blades, and swords(?). And then I bellied up to the bar and chowed down on the freshest, tastiest sushi I have ever had (and probably ever will). There is much chatter online about whether Tsukiji is worth rising before sunrise. I’m telling you here and now that it is. Set the alarm, grab some good coffee (and there’s plenty in Tokyo!), and make your way to the auction. No regrets.
Fresh Coconut (Roseau, Dominica)
We stayed with a friend’s aunt in Dominica [dom-ih-NEE-kah], a lesser-known island in the Caribbean that they call the “Nature Isle.” Dominica is the island out of storybooks with rolling hills, lush forests, untouched hotsprings, rocky shorelines, and coconut palms for miles. After one particularly festive evening out with friends, our crew was not feeling 100% in the morning. Noticing our struggle, our hostess convinced a young Haitian boy to climb the large palm in the yard and get some coconuts. As if his tree climbing and coconut machete skills weren’t impressive enough, the juice from the coconuts was unlike anything I’ve ever tasted. Sweet, sour, creamy, refreshing…and the perfect cure for whatever happened last night.
Bratwürst and sauerkraut (Munich, Germany)
Munich sausage cart
Classic brat and kraut
I’ll start of by saying that I did not spend enough time in Germany. But, with any luck, I’ll be headed back to Bavaria this fall for redemption. In my short stint in Munich I had my fare share of snacks. My favorite, by far, was none other than the classic bratwürst. This is not the sausage of your childhood potluck or 4th of July gathering. Cast away your expectations set by Johnsonville and Jimmy Dean, this is the real deal. Fresh sausage with subtle spicing, perfectly browned and served atop a juicy bed of homemade crunchy and tangy sauerkraut. This ups the sausage game to level 10. German sausage carts are plentiful and with so many different types to choose from, it is hard to pick a favorite. I made a point to work my way through the menus, but I always came back to the brat. The classic wins again.
Gorditas de nopales (Bernal, Querétaro, Mexico)
In summer of 2015 I joined Dan on a work trip to Mexico City. We stayed with a co-worker of his (Victor) who lived about three hours outside of the city center in Querétaro (the traffic is way worse than L.A., so I’m pretty sure he lived a few blocks from the office). Our time with Victor included some of the sportiest adventures we’ve experienced and he never led us astray for good eats. I love Mexican food so it was hard to pick a favorite from this trip – I could have done a top 10 for Mexico City alone – but the Gorditas de nopales from Bernal cannot be beat. Fresh masa cooked on a flat grill while you wait, then stuffed with sauteed nopales (cactus) and served with freshly ground red chile straight out of the mortar. I could eat them everyday. Is that an option?
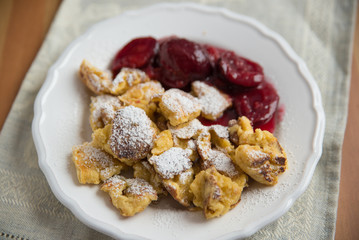
Kaiserschmarren with Zwetschkenröster (Vienna, Austria)
Somehow the Danes got all the credit for making pastries, but the truth is that Viennese pastries are the inspiration behind your Americanized “danish” (Fun Fact: The Danish word for “danish” is wienerbrød which means ‘Austria Bread’). Austria was part of my solo backpacking adventure in 2007 and, as a frugal and hungry traveler, I was always up for a cheap and delicious snack. Enter the Viennese bakery. Vienna has some of the most impressive, yet unassuming, bakeries that I have stumbled upon (and when it comes to baked goods, I can stumble like a champ). Of all the nibbles I had in Austria, kaiserschmarren was my favorite. Kaiserschmarren is an eggy, almost custardy, pancake that has been shredded while it cooks. It is served with fruit compote, most commonly zwetschkenröster, which is made from plums. The pancake is a soft texture with crispness on the outside and the plums adds a fresh and sweet contrast to the doughy noodle-like pastry pile. My favorite experience of kaiserschmarren was, like many of my adventures, a serendipitous event. I got turned around while en-route to the Freud museum and I walked into some sort of mid-afternoon cocktail party in an art gallery where my smelly, backpack-schlepping self was welcomed with open arms and given a plate of shredded pancakes and a glass of wine. A delightful older woman led me around the exhibit, pointing and (what I can only assume was) talking about the paintings, clearly undeterred than my German was limited to Ja, Nein, and Bier. Now that is Austrian hospitality!
Several years ago Dan started bringing home strange ingredients and challenging me to make something out of it. Perhaps spawned from my binge-watching of Chopped, or just because he knows that I love a good challenge, this became a frequent event at dinner time. I tackled all kinds of bizarre ingredients and, to be honest, I probably spent more time Googling than cooking. Some efforts were rewarded with tasty meals and others were total flops.
Then, sometime last year, I informed Dan that this Chopped-ish challenge would go both ways. After all, he was clearly missing out on all the good times. He agreed, but we revised and upgraded the plan.
Thus, World Cuisine Challenge was born.
The new rules: One person picks a country (any country). The other person has to research the country’s cuisine, pick a night of the week, and cook a typical dish from that country. No whining, no excuses…Cook like a champion.
Verdict: SO MUCH FUN!
To date we have researched and cooked with inspiration from eight countries (as follows):
Laos (Dan)
Romania (Carolyn)
Angola (Dan)
Azerbaijan (Carolyn)
Papua New Guinea (Dan)
Bolivia (Carolyn)
Italy (Dan)
Fiji (Carolyn)
We’ve have some rock-star dinners, mediocre meals, and a few epic failures. It’s all about the journey.
Tonight was Fiji night. Here’s how it went…
Food in Fiji
Fijian food is remarkably simple. That’s probably because Fiji is an island smack in the middle of the world’s largest ocean. But with isolation comes resourcefulness.
The people of Fiji know how to use a few core ingredients to whip up some delectable dishes of fish, root vegetables (taro, cassava, and something called duruka, which is a flower of a cane root), rice, and coconut. There is some culinary influence from India, as there were a handful of folks who came over in the late 1800s, but otherwise things have stayed much the same.
For my Fijian challenge I chose a coconut-based, curry-like fish dish that is loosely referred to as “fish in lolo.” The internet boasts several variations based on a similar core ingredients: mild white fish, coconut milk, hot peppers or chilies, and limes/lemons/lemongrass.
Sign. Me. Up.
In post-meal reflection, “fish in lolo” reminded me of a blend of Thai and Indian curries. Spicy yet sweet, creamy but light, and super flavorful. According to the internet (i.e., numerous authors of varying quality, accuracy, and expertise), this is a common curry-like dish that uses up “what’s left in the fridge.”
Like many curry and curry-ish recipes, this comes together quickly. I’m a big curry fan because they are fast and simple, and they make for some delicious leftovers.
Want to up your curry game? Try this one out!
Step 1: Mise en place. Yes, that’s the extent of my French. Mise en place means “put in place.” Or, my translation: “Get your s*** in order.” This is really important for curry recipes, as they are so fast that you don’t have the time to leisurely dice a pepper before your coconut milk has burned. Chop everything ahead, measure out your spices, and have all ingredients on the counter before you start. Use small prep bowls (a great investment if you love to cook) or sort items on a large cutting board. Prepping ahead means less stress later (that phrase could go on one of those generic inspirational posters with pictures of oak trees…).
Now that everything is prepped and ready, let’s get started!
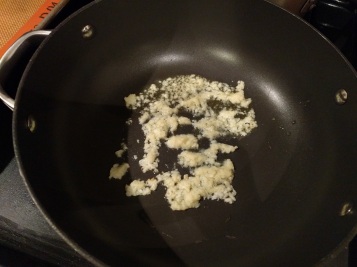
Start with the aromatics. Swirl a bit of olive oil into a large, deep skillet, and add the garlic and ginger. Stir it around for a minute or so until it smells delectable – not too long or it will burn.
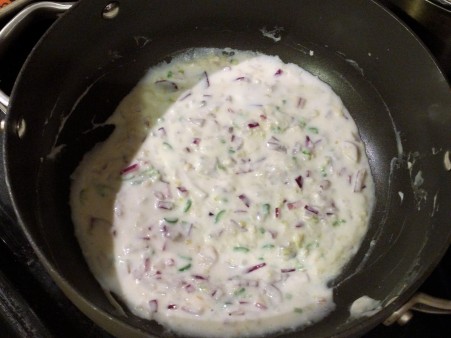
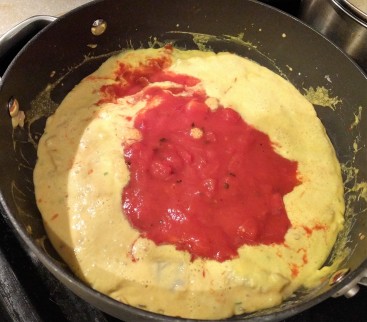
Add to the skillet the red onion, hot pepper, lemongrass, and about 1/3 of the coconut milk. Stir it all together. If it looks like frosting for a Mardi Gras king cake, you’re on the right track!
I’ve got the cake! Now where are the floats?
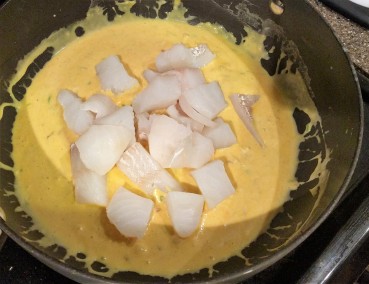
Give this about 3 minutes to cook and meld together. When you start to smell the lemongrass, add in the rest of the coconut milk, the turmeric, and the cumin. It’s going to turn yellow and that’s OK! Some might argue that it would be better to toast the spices with the garlic and ginger at the beginning – try it either way.
After the sauce has returned to a uniform color, add the fish pieces and toss to coat. Then add the fish sauce, brown sugar, and lemon juice.
Cover with a lid for about 7 minutes (still medium heat) to cook the fish through. Don’t know what to do with yourself while you wait? I recommend pouring yourself a glass of chilled Sauv Blanc. Cheers.
Rowan looking characteristically unimpressed by dinner-in-the-making.
Return to the stove (preferably with glass of vino in hand). Add the crushed tomatoes. It will now look like a McDonald’s advertisement. Don’t worry, your dinner is going to taste WAY better than that sorry excuse for “food.”
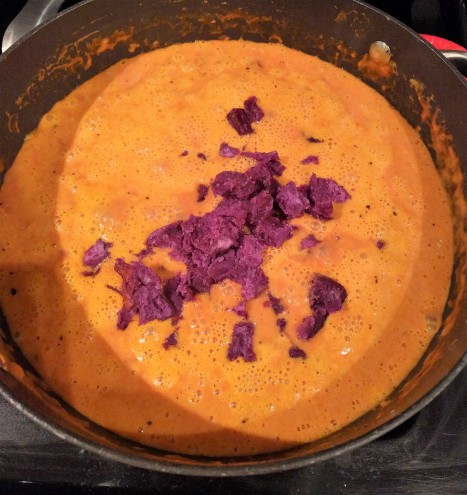
Then add the sweet potato (par-cooked makes the process faster). I found a purple sweet potato at the store, which loosely resembles the violet color of taro root. Oh hey, Phoenix Suns curry!
This one’s for Charles Barkley, Dan Majerle, and Steve Nash…
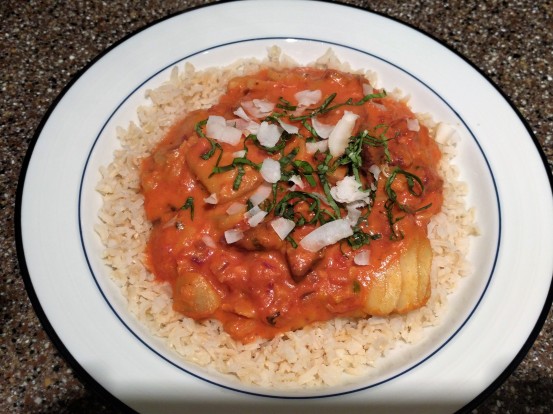
Put the lid on again for a few minutes while you gather some plates. When plating, serve the curry on top of rice. Top with basil and/or unsweetened coconut flakes.
When your first plate is gone, go back for seconds. No judgment.
World Culinary Challenge is a blast. I encourage others to try it out in their own kitchens. Even if it’s just once a month or every-other month, expand your horizons, and check out recipes from lands unknown (or at least unknown to you). Passport to culinary adventure begins now!
“Fish in Lolo” (Fijian-inspired Coconut Curry with Fish)
Ingredients:
1 lb. sturdy, white fish (Mahi Mahi, cod, snapper), cut into 1-2 inch pieces
1 large taro root (sweet potato is a good substitute), chopped into 1 inch pieces and par-cooked over the stove for about 10 minutes
1 hot chile pepper (serrano, red Thai chiles), finely chopped
2 large tomatoes, coarsely chopped and seed removed
1 stalk of lemongrass, minced (if you can’t find lemongrass, extra lemon juice will work)
1 can (400mg) of coconut milk
1 tsp. tumeric
1 tsp. cumin
1 tsp. garlic, minced
1 tsp. fresh ginger, minced
1 tsp. fish sauce
2 tsp. brown sugar
Juice of 1/2 of a lemon
Basil (chiffonade) and unsweetened coconut flake, for garnish
Directions
Prepare ingredients: Remove outer leaf of lemongrass and finely chop. Dice onion. Peel the garlic and mince the ginger. Slice chile, scrape out seeds, then finely chop. Roughly chop tomatoes. Chop the sweet potoates into cudes. Cut up the fish. Measure out the turmeric and cumin.
Heat a large fry-pan on medium heat. Add ginger and garlic and cook until fragrant (1-2 minutes). Add ¼ cup of the coconut milk, lemongrass, chile, and onion and cook until tender, 2-3 minutes.
Stir in remaining coconut milk, turmeric, and cumin. Simmer for a minute or two.
Add fish pieces and toss to coat. Cover and let cook for about 5-7 minutes, until fish is cooked through but still tender.
Add tomatoes, lemon juice, fish sauce, and brown sugar. Simmer for 2-3 minutes. Add salt and pepper to taste.
Serve over rice. Top with basil and/or unsweetened coconut flakes
Yesterday a friend of mine sent me a panicked text about chocolate.
She was gathering ingredients to make a chocolate cake and she noticed that her chocolate had turned “white.” Our conversation went something like this:
Kim: Carolyn! Is my chocolate ok?! Is that mold?!
Me: It’s fine, you can use it. It’s called “chocolate bloom”
Kim: Am I going to die if I eat it? I’m making a bday cake – the livelihood of others is on the line
Me: No one is going to die. It’ll taste the same, just melt it like usual
Kim: Ok, thanks!
Me: I think you need a glass of wine…
Kim: Probably more than one.
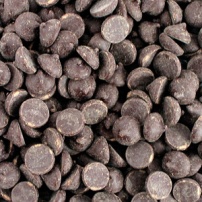
Kim had sent me a photo of her chocolate. It resembled this:
You’ve probably been through this before. Walk into the pantry to grab the bag of chocolate chips or blocks of baking chocolate. You open the package and the chocolate looks old and dusty, like a box in grandma’s attic.
“Attic” chocolate!
That’s called “blooming” and there is no reason to panic!
Let’s talk science, shall we?
First let’s address the ingredients in chocolate. Most baking chocolates are made of cocoa (in the form of powder, liquor, or a combination), cocoa butter, and some elements of sugar and soy lecithin (prevents the cocoa and the cocoa butter from separating). The latter ingredients are what distinguish unsweetened, bittersweet, and semi-sweet chocolate varieties.
Chocolate, in its form as baking bars, chocolate chips, etc., is a shelf-stable product…so long as you treat it with care.
In a basic scientific explanation, things stay the same unless an external agent is introduced. This can be called stability, constancy, or equilibrium.
That chocolate bar wants to stay the way it is. Unfortunately, our kitchens are not stable environments. The weather changes outside (temperature swings, rain, snow, dry heat, humidity), you open and close windows, and the pantry gets shuffled around. If you’re in my house, Dan finds his way into the bag of chocolate chips when you’re not looking, forgets to seal the bag, and the next day he blames it all on the dog.
When chocolate is exposed to the “elements” for a period of time, the chemistry of the chocolate changes. Typically this occurs in one of two forms…
What is “Bloom”?
There are two main causes of bloom: Fats and Sugars
Fat Bloom:
Fat bloom occurs when the cocoa butter separates itself from the cocoa solids. This is usually due to drastic temperature change. Ever left a chocolate bar in your car and then tried to “freeze” it back to a solid state? It probably suffered from fat bloom and looked like the surface of Mars was covered in a blanket of chocolate…mmmmm…
If Mars is made of chocolate, put me on the next shuttle!
Fat bloom will make the chocolate more brittle. It also probably won’t taste as delicious if you simply eat it. However, it works “normally” in any recipe that requires you to melt or temper the chocolate. All the ingredients are still there, they have just have to be put back together. You need to melt it all back to chocolate harmony. Check out a great tutorial on tempering chocolate (without ruining it) here.
Sugar Bloom:
Sugar bloom is the result of water or moisture coming into contact with the chocolate. This is what happened to poor Kim.
When moisture comes in contact with chocolate, the sugar separates (in a similar manner to the cocoa butter above), causing the sugar to crystallize. From a glance sugar bloom looks like chalk or dust. But if you zoom in, it will remind you of tiny Champagne bubbles.
The dusty white stuff on the outside is crystallized sugar that has risen to the top/outside of the chocolate. A quick fix to this is to grate off the bloom (I prefer a thin Microplane but any grater will do). You don’t have to go crazy because it is a very thin layer. Your chocolate will look good as new!
Similar to chocolate that has suffered by fat bloom, sugar bloomed chocolate can still be used in recipes that require melting or tempering. You can throw still use chocolate chips that have experienced sugar bloom, but the chips will still look chalky in the final product.
Preventing Chocolate Bloom
It’s all about storage. To prevent fat or sugar bloom, it is best to keep chocolate in an air-tight container, in a cool, dark place, and away from windows, heat sources, or other things that affect temperature.
I recommend a small, glass Snapware tub to keep air and moisture out.
Can chocolate expire?
Absolutely. Typically chocolate bars last between 4-6 months stored (properly) in the pantry, and may last a few extra months if stored in the fridge or freezer.
When in doubt, throw it out. Expired chocolate does not have a distinct visual change but the flavor is often bitter. It will not be remedied by melting or tempering.
In my house chocolate never expires. It gets eaten way before that could ever happen, but word on the street is that not everyone has the same self-control issues that we do. Guilty as charged.
There you have it! Chocolate science!
And if you’re wondering, Kim’s cake turned out great, the birthday party was a blast, and nobody died.
*This is a departure from my typical culinary content, but I hope you can appreciate a brief personal reflection during a politically-challenging time in America.
It has been one week since the March on Washington but it has felt like an eternity. The days have been filled with breaking headlines, clips of protests, a host of tyrannic executive orders, and threats to the very democracy on which this country has thrived. I’ve yelled, cried, and drank. I’ve called senators and representatives. I’ve joined a local advocacy group. I have also observed a level of anger in myself that I have never had to experience.
I have also had time to process and reflect on last weekend, and I feel ready to share.
Reminiscence
For me, the March provided both validation and momentum. It was a weekend of strength, passion, love, and courage. A reminder that there are so many Americans united against acts of hate and injustice.
It started before I even arrived in Washington. On my plane from Albuquerque I sat next to two women with the same plan. As people boarded the plane there was a noticeable imbalance of female to male passengers. Pink hats and WMW t-shirts were everywhere. There was a photographer on board who couldn’t resist taking photos and interviewing women during the flight. The white, middle-aged man (on the plane for a business trip) sitting in front of me said, “I am so impressed and so proud. Go get ’em, ladies!”
I met my brother and my friend, Beth, in Washington. It was Inauguration Day. With the March the following morning there was a dizzying mix of red Trump baseball hats and pink knitted “pussyhats.” Interactions were generally non-existent between the wearers, and you could cut the tension with a knife.
The next morning we made our way to the Mall. Walking toward the Capital you could feel the energy. A hopeful and contagious energy. There were people of all ages, genders, races, and ethnicities. In the moment it was impossible to appreciate the magnitude of it all.
Standing not too far from the stage, the Mall was crowded, yet peaceful. I never knew a crowd of half-a-million people could be so polite. At the time, we had no idea that the crowd was spilling out of the Mall and into the streets of D.C. Cellphone service was overwhelmed and there was no chance of getting a signal. It allowed us to be present and that was an incredible gift.
In the thick of it we watched the speakers and performers of the rally, chatted with the people who were invading all personal space, and pointed out some of what may be the wittiest protest signs in history. It reminded me that with activism comes camaraderie, and in turn, with anger comes joy.
The march itself was “cancelled,” but a large group (what I can only estimate to be 50,000+) marched anyway. We snaked through the streets of D.C., past Trump Hotel and the White House, and dispersed somewhere near Dupont Circle. With signs above our heads we yelled chants at the top of our lungs. “My body, my choice!” “Love, not hate, that’s what makes America great.” “Show me what a feminist looks like! This is what a feminist looks like!” Most importantly, we supported each other.
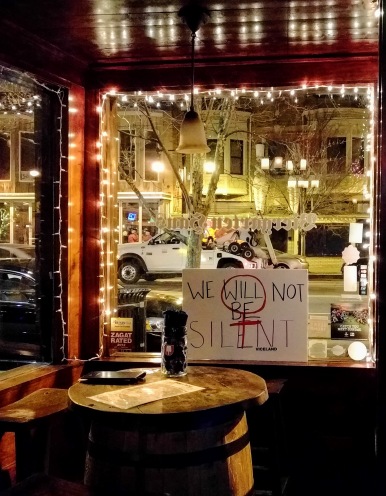
After the march my brother and my friend walked back toward our Air BnB, still stunned by the enormity of the crowd, yet ignorant of all the marches that were occurring around the globe. We found our way into a bar, sat down at a wine barrel-turned-table and ordered Makers & Gingers. On the TVs were news reports pouring in about the numbers of peaceful marchers around the country and the world. It gave me hope.
Reflection
The March was also a humble reminder of my own privilege. I grew up with loving parents who fostered independence from a young age. My mother is a strong, kind, and well-educated woman who modeled a remarkable sense of self-reliance, tenacity, and respect of all people. My father is a commanding force of ideas, intellect, and reason, yet he also conveys compassion, understanding, and humility in all that he does. My brother is a passionate and outspoken young man with a heart of gold and a sweeping appreciation for the talents and sentiments of others. In a world that has begun to normalize “locker room talk,” it feels necessary to say that, in all our years, he has never made a single derogatory remark about women. In fact, he marched right beside me in Washington.
As a child I wanted for nothing. We had a large house, multiple cars, plenty of delicious food, adequate medical care, and a home filled with love. As a white girl in a suburban neighborhood, daily life was not a struggle. I grew up attending a church that supported gay marriage. I participated in after-school activities, sports, and clubs. My parents taught me life skills. I was allowed to make mistakes, to fail, with a cushion of support to catch me. I had positive male and female role models in the forms of teachers, coaches, and family friends, all of whom respected women and minorities. I was encouraged to push boundaries and ask questions. I was damn lucky.
I also grew up among some fierce female friends who have gone on to become doctors, lawyers, professors, entrepreneurs, teachers, and mothers. I can’t take the credit for their strengths and accomplishments, but I will say that my Rolodex is pretty impressive and I’m blessed to have such badass women in my life.
In essence, I am privileged. I haven’t had to fight, I have chosen to fight. And that is privilege at its core.
As a white female I have benefited from a political and social system that treats me with more respect than women of color or other racial, ethnic, and religious minorities. My outrage was sparked when my own rights were threatened, and not in the years past when minorities were fighting for the rights I took for granted. For this I owe a long-overdue apology that will be woefully inadequate. To those with less privilege, I am sorry for not being as good of an advocate as I could have been. I cannot retrace my steps and improve my actions, but I can promise to be a voice from this point forward.
At the March on Washington I was surrounded by those of similar privilege and plenty of those whose lives have been much different than my own. Across all seven continents we saw a mix of genders, races, ethnicities, religions, and beliefs. People with disabilities. People who are rich and poor. Seasoned activists and first-timers. All ages, including grandparents and children. The unemployed to the CEOs. It was a reminder of why this movement is so important. We are only strong if we help those who do not have a voice.
We must come together to take on a force of hate, oppression, and injustice.
 that caused enough flooding to shutdown the city landmarks. But we traipsed around anyway, and with soggy shoes and inadequate umbrellas, we sought out delicious food and coffee to warm us up. Our trip took us around the “boot” with a sampling of Italy’s best. We walked the eerily modern roads of Pompeii, navigated the back alleys of Naples, saw the beauty of the Amalfi coast, hiked a volcano in Sicily, drank wine in Tuscany, and did a cicchetti “crawl” in Venice. But no matter where we were in Italy, the food was incredible. Never have I eaten so many carbs with so little regret.
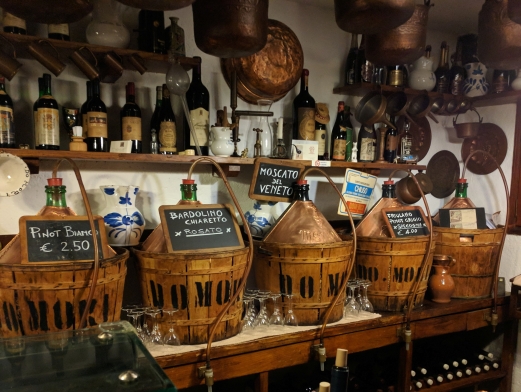


")


 Step 1: Prepare the hazelnuts. Depending on the hazelnuts you purchase, you may have to remove the skins before chopping. The last time I was at TJ’s I came across this magical bag of peeled, roasted, and unsalted hazelnuts. All the work done for me!
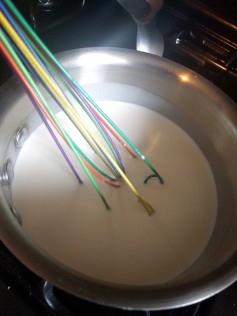


")